Windows AI Foundry is a platform designed to help developers build and deploy AI models efficiently on Windows devices. You can even integrate it into your workflows and applications through an intuitive CLI, SDK, and REST API. In this post, we are going to talk about AI Foundry and see how can download and install Windows AI Foundry locally.
What is Microsoft AI Foundry?
Foundry Local is an on-device AI tool that runs models directly on your hardware, enhancing privacy and reducing costs by eliminating cloud services. It integrates seamlessly with existing workflows via a user-friendly CLI, SDK, or REST API, allowing for flexible customization with preset and custom models. Processing data locally keeps sensitive information secure and lowers recurring expenses. Designed for simplicity, it can easily scale to Azure AI Foundry, facilitating a smooth transition to cloud deployment without upfront commitments.
This solution suits scenarios requiring data privacy, offline functionality, or low-latency AI responses, such as real-time applications. It’s ideal for cutting cloud costs, experimenting with models locally, or operating in disconnected environments. Foundry Local works on existing infrastructure, eliminating the need for an Azure subscription, making AI accessible while maintaining control over hardware and data. Its adaptability supports diverse needs, from secure processing to cost-effective scaling, without relying on internet connectivity or external services.
Download Windows AI Foundry Locally
If you want to download Windows AI Foundry locally, you will have to follow the steps mentioned below.
- Meet the system requirements
- Install Foundry
- Run your model
- Useful Commands
Let us talk about them in detail.
1] Meet the system requirements
Just like any other utility, AI Foundry requires you to meet certain hardware requirements before installing it on your computer. We have listed the system requirements below. First, check if your system has what it takes to use the tool.
- OS: Windows 10 (x64), Windows 11 (x64/ARM), macOS.
- Memory: 8 GB or more
- Available Space: 3 GB
- Acceleration (optional): NVIDIA GPU (2,000 series or newer), AMD GPU (6,000 series or newer), Qualcomm Snapdragon X Elite (8GB or more of memory), or Apple silicon.
Once you know that your system can handle Foundry AI, go to the next step.
2] Install Foundry

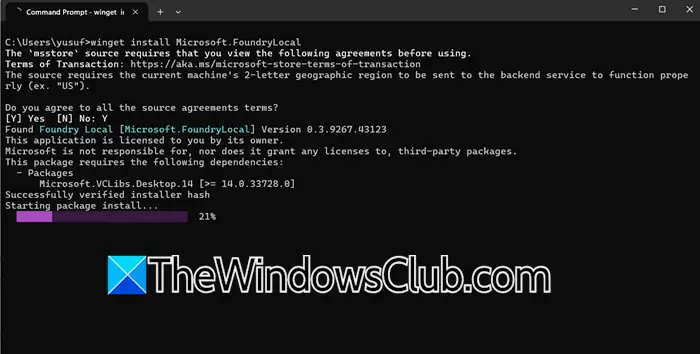
Now that we know your computer can handle Foundry, we will go ahead and install its module. To do so, you need to open Windows Terminal and run the following command. If you want to install Foundry for all users, you will have to open Windows Terminal as an administrator.
winget install Microsoft.FoundryLocal
You will be asked to agree to agreements; hit Y to confirm. Wait for a few minutes as your computer installs the module.
Alternatively, you can even go to github.com and then expand Assets. Then, click on the hyperlink to download the installation media or the ZIP file, and finally install it on your computer.
Note: The command mentioned above is for Windows machines; if you are using macOS, you need to run ‘brew tap microsoft/foundrylocal‘ & ‘brew install foundrylocal‘.
3] Run your model

After installing the AI Foundry module, we will install a simple model – phi-3.5-mini. It is lightweight and efficient. It is made for local devices and handles text tasks like answering questions, generating content, and summarizing information. People commonly use this model to test or try out AI features in local settings. It works well in offline situations and is a good choice where data sensitivity is important. Its compact design allows for quick setup and puts minimal strain on your hardware.
To install it, run the following command in Windows Terminal.
foundry model run phi-3.5-mini
Now, you can ask a simple question, such as “Why do we need to eat?” in the CLI itself and let it answer.
4] Useful Commands
The Foundry Local CLI organizes commands into three categories for streamlined management: Model (run, manage models), Service (control the local service), and Cache (handle downloaded models). Use foundry –help to see all commands, and add –help to any category (e.g., foundry model –help) for specific guidance. This structure simplifies workflows, enabling quick access to tasks like starting models, adjusting services, or clearing cached files, all while maintaining clarity and ease of use. We have mentioned the useful commands below.
- To list all commands: –help.
- To start, stop, or configure models: model –help.
- To restart, update, or monitor the local services: foundry service –help.
- To view, clear, or manage downloaded models: foundry cache –help
Hopefully, with the help of this post, you will be able to install and use AI Foundry locally.
Read: How to install LLaMA 3 locally on Windows PC?
Is Azure AI Foundry free?
Yes, Azure AI Foundry offers free access during its preview phase. However, any Azure AI services or cloud resources used within Foundry are billed separately. Pricing depends on the specific AI models, storage, and computing power utilized. For more details, users should check the Azure AI Foundry pricing page.
Read: How to build AI Agent: Beginners Guide from Microsoft
How do I install Foundry on Windows?
To install Foundry on Windows, you need to make sure that you meet the system requirements mentioned earlier. If your computer is compatible, run – winget install Microsoft.FoundryLocal. It will take some time, depending on your Internet speed, so let it install.
Also Read: How to run DeepSeek locally on Windows 11.
Leave a Reply